pfsense is a free network firewall software with capabilities envied by its commercial counterparts. The load balancing mechanism is provided by a plugin called HAProxy
In this configuration we have deployed two pfsense VMs, one on ESXi1 and one on ESXi2 and configured them in HA.
On a previous part we made a note of the load balancer IP which was xxx.yyy.zzz.160. We set this is up as a Virtual IP on the Master pfsense.
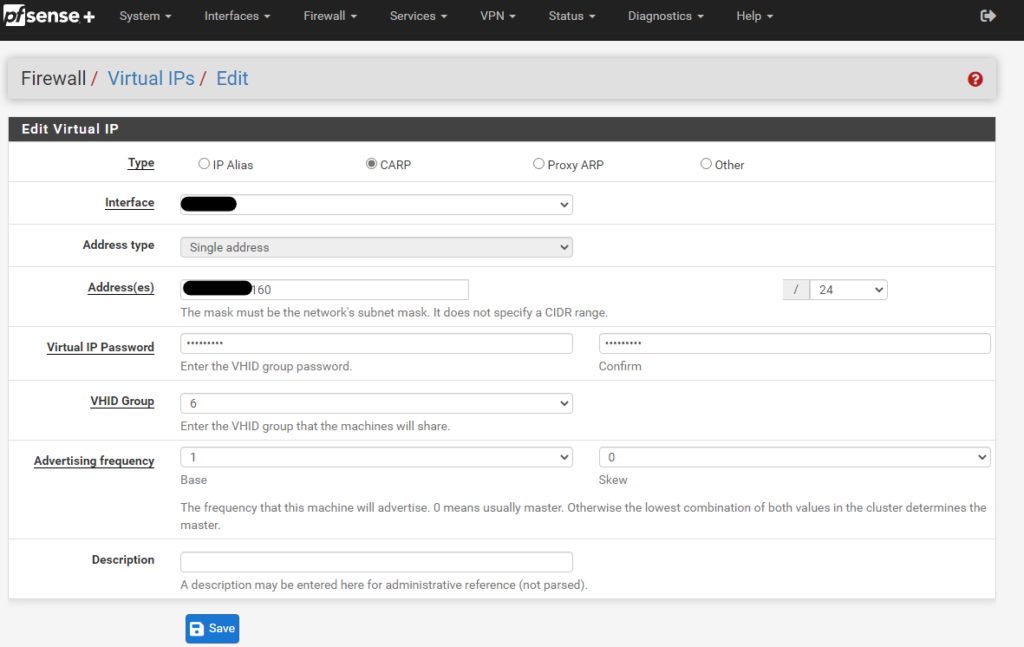
In this case, we setup the VIP as CARP. If you have a single pfSense then you select IP Alias, the Interface that connects to your recently deployed soon to be K3s nodes VMs, the address, subnet mask and Save.
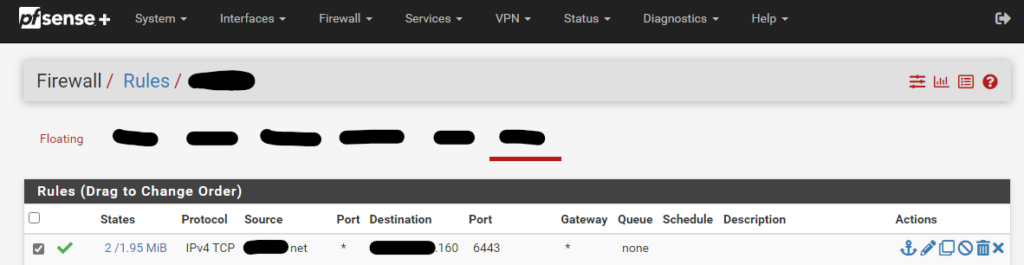
Then we configure a firewall rule to allow connections to this IP on port 6443.
Then we navigate to HAProxy, Backend and create a new Backend server pool with the three node IPs and port 6443 and Load Balancing option Round Robin. No encryption!

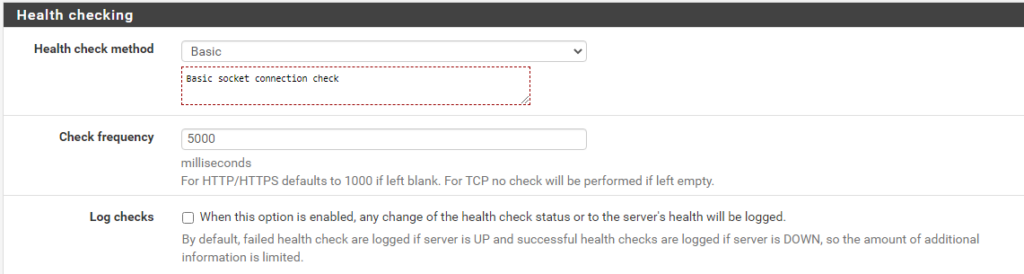
Further down under Health checking select Basic and 5000ms for Check frequency
Save and Apply the configuration.
Switch to Frontend and Create a new one following the screenshots bellow. The highlighted parts are the ones you need to fill in or select.
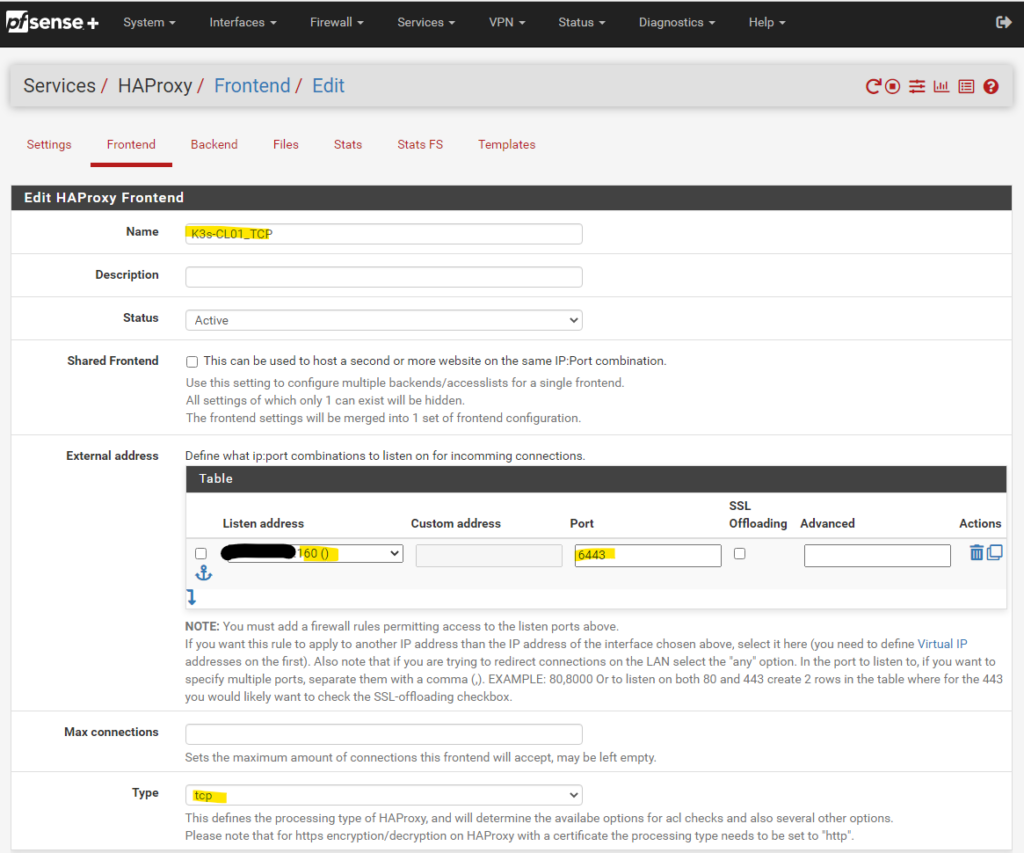
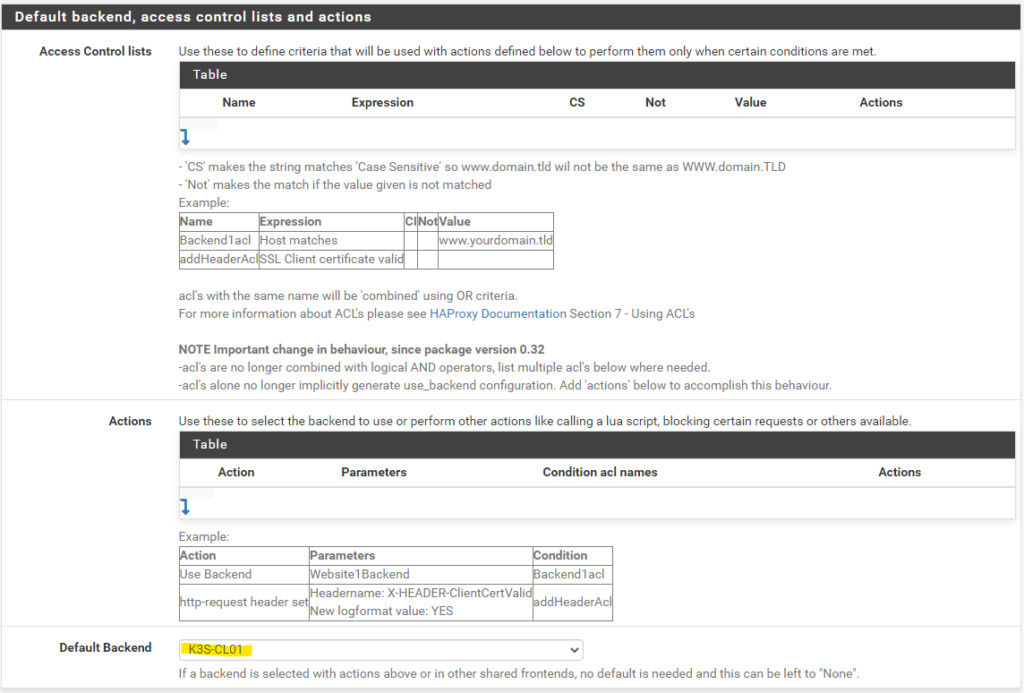
Save and Apply the changes.